What File Formats Work for Large Format Printing? Your Comprehensive Guide
The complete guide to print-ready file formats — large format, digital, and offset. Resolution requirements, color mode, PDF/X standards, bleed, and the checklists our prepress team uses, all in one place.
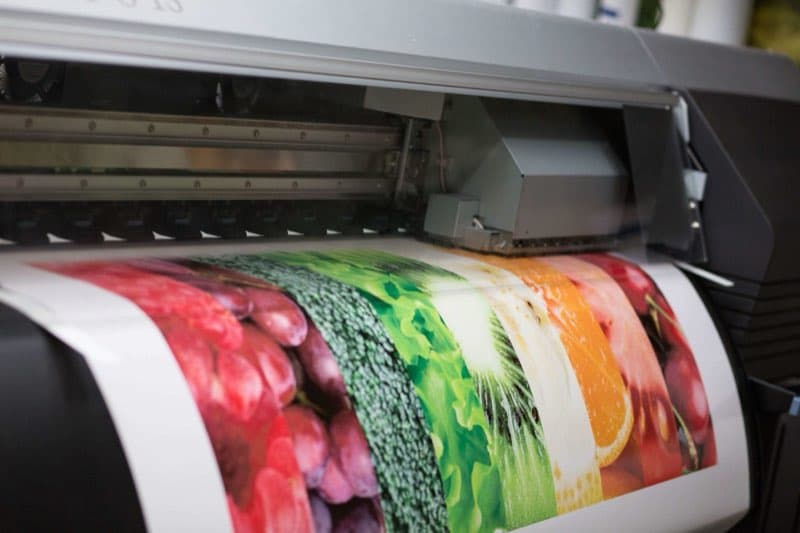
File Formats for Large Format Printing: Why This Matters More Than You Think
Large format printing has file requirements that differ meaningfully from standard commercial printing — particularly around resolution, color mode, and file structure. A file that looks perfect on screen may produce soft, pixelated output at banner scale. Understanding these requirements before you create your files saves time, money, and frustration.
The Best File Formats for Large Format Printing
PDF (Preferred)
PDF is the universal standard for print-ready file delivery, and large format printing is no exception. A properly created PDF preserves your fonts, images, colors, and layout regardless of what software created it. Specifically:
- PDF/X-1a: The most compatible standard — all colors in CMYK, all fonts embedded, no transparency. Works with virtually every RIP software.
- PDF/X-4: Supports live transparency, which simplifies file creation in modern applications. Most large format RIPs handle this well.
- High-resolution PDF: If you can't use a PDF/X standard, export at print quality with fonts embedded, images at full resolution, and no compression of image data.
Avoid creating PDFs by "printing to PDF" from Windows or using low-quality export presets — these often downsample images and can produce poor print results.
TIFF (Flattened Raster Files)
A flattened TIFF at the correct resolution and color mode is a reliable format for image-only large format files. TIFFs contain no live text or vector elements — everything is rasterized. This means they're appropriate for photographic large format prints, not for pieces with text that needs to be sharp.
For a TIFF to be print-ready for large format: color mode should be CMYK, resolution should be correct for the output size, use no compression or lossless LZW compression, and save flat with no layers.
AI and EPS (Vector Files)
Adobe Illustrator (AI) and EPS files are excellent for large format work that is primarily vector-based — logos, type, geometric designs, and illustrations. Vector artwork scales infinitely without resolution degradation, making it ideal for large format applications.
If you supply an AI or EPS file, make sure to outline all fonts (convert text to paths), embed or include all linked images, set the document color mode to CMYK, and include the bleed area in the document setup.
PSD (Photoshop)
Photoshop PSD files are acceptable for large format work, particularly for photographic content or complex composited images. Flatten the file before submitting, ensure it's in CMYK, and confirm the resolution is correct.
The Resolution Question: How High Is High Enough?
This is where large format printing trips up most designers unfamiliar with the process. You do not need 300 dpi at full print size for large format work. Large format prints are viewed from a distance — a 10-foot banner is typically viewed from at least 5–10 feet away. At that viewing distance, 72–100 dpi at full size is perfectly sharp.
Industry standard resolution guidelines for large format printing:
- Pieces viewed up close (within 2–3 feet): 150–200 dpi at full print size
- Standard signage (viewed from 5–15 feet): 100–150 dpi at full print size
- Large outdoor displays (viewed from 15+ feet): 50–100 dpi at full print size
- Billboards and very large format (viewed from 50+ feet): 15–30 dpi at full print size
A practical workaround: create the file at 1/10th or 1/4 scale at 300 dpi. A 10' × 4' banner created at 1' × 0.4' at 300 dpi is equivalent to 30 dpi at full size — fine for that viewing distance. Specify the scale when submitting to your printer.
Color Mode: Always CMYK
Supply large format files in CMYK, not RGB. Most large format presses use CMYK inks, and while RIP software will convert RGB to CMYK, the conversion may not produce the color results you expect. Converting to CMYK in your design application gives you control over how colors are translated. Sheetfed work plays by stricter rules still — our essential guidelines on preparing files for offset printing spell them out if your project spans both worlds.
One exception: some printers prefer RGB files for specific output profiles on their wide-gamut inkjet presses. Ask your specific printer what they prefer before assuming.
Bleed for Large Format
Bleed requirements for large format are typically larger than for standard offset printing:
- Banners and signs trimmed after printing: 0.25"–0.5" bleed on all edges
- Banners with hemmed edges: The hem itself provides margin; your printer will specify requirements
- Rigid boards: 0.125"–0.25" bleed is typically sufficient
File Size Considerations
Large format files are big — sometimes very big. A 10' × 4' banner at 150 dpi full size generates a file over 1 GB. Use WeTransfer, Dropbox, or Google Drive for large file uploads rather than email. Ask your printer if they have an FTP or file upload portal. For very large files, a USB drive delivered in person is sometimes the most practical option.
Quick Checklist Before Submitting a Large Format File
- Format: PDF, TIFF, AI (outlined fonts), or EPS
- Color mode: CMYK
- Resolution: Correct for viewing distance (not necessarily 300 dpi)
- Bleed: Included on all edges that will be trimmed
- Fonts: Embedded (PDF) or outlined (AI/EPS)
- Images: Embedded or linked files included
- File size: Uploaded via transfer service, not email
Vector vs. Raster: Build Files the Right Way
The biggest quality decision in a large-format file is often whether elements are vector or raster. Vector artwork — logos, type, line work, and geometric shapes created in Illustrator — is defined by math, so it scales to any size with perfectly crisp edges. Whenever possible, keep text and logos as vector and outline the fonts before submitting. Raster images — photographs and complex textures — are fixed grids of pixels and degrade if enlarged beyond their resolution. The ideal large-format file combines both: vector type and logos sitting on top of appropriately-resolved raster imagery. Rasterizing your entire design into one flat image throws away the crispness vector type would have given you, so preserve vector elements wherever you can.
Common File Mistakes That Cause Reprints
- Low-resolution images upscaled in the layout — a small web image stretched to banner size looks soft and blocky no matter the press.
- RGB files with no conversion intent, leading to unexpected color shifts at RIP.
- Fonts neither embedded nor outlined, causing substituted typefaces.
- Missing or insufficient bleed, producing white slivers after trimming.
- RGB blacks built as rich black in large solids, which can look muddy or inconsistent — specify the black correctly for the output.
Setting Up Files at Scale: The 1:10 Workflow
Designing a 20-foot banner at full size produces an unwieldy file and can exceed application limits. The standard professional workaround is to build at a known fraction of final size and let the printer scale it up. A common approach is 1:10 — design at one-tenth the finished dimensions at 300 dpi, which equals 30 dpi at full size, ample for a piece viewed from a distance. The critical step is communicating the scale clearly when you submit, ideally in the file name and a note, so the printer enlarges by exactly the right factor. Vector elements scale losslessly regardless, and raster images stay within practical resolution. This workflow keeps files manageable while still delivering crisp output, and it's the norm for very large pieces where full-size files would be impractical to create or transfer.
File Formats for Digital Printing
Digital printing — the process behind most short-run business cards, brochures, postcards, and marketing collateral — plays by different rules than large format. These pieces are viewed up close, so resolution requirements are higher and fixed: 300 PPI at final print size, in CMYK color mode, with at least 0.125" bleed on any edge where color or imagery runs to the trim. A file can be technically valid and still print poorly if these basics are wrong, which is why preparing the source file matters as much as choosing the right export preset.
For virtually all digital printing jobs, we strongly prefer a print-ready PDF exported as PDF/X-1a or PDF/X-4. These print-industry standards ensure:
- All fonts are embedded in the file
- All images are included (linked files are not missing)
- Colors are properly defined in CMYK (for PDF/X-1a) or with transparency preserved (for PDF/X-4)
- Bleed and trim marks are correctly set
There is a reason PDF dominates print submission: it locks down everything that can otherwise drift between systems. A properly exported PDF embeds its fonts, carries its images inside the file rather than as fragile links, and fixes the page geometry. Compare that to sending a native layout file, where a missing font or an unlinked image on the printer's system can change the output entirely. When you hand over a print-ready PDF, what you see is what gets printed.
Accepted Application Files for Digital Jobs
- Adobe InDesign (.indd): Our preferred application format. Submit the package (File > Package) to include all linked images and fonts.
- Adobe Illustrator (.ai or .eps): Acceptable for single-page or simple multi-artboard files. Outline fonts or include fonts with the file.
- Adobe Photoshop (.psd or .tiff): Acceptable for single-image files (covers, posters, full-bleed photographic pieces). Must be at 300 PPI at final print size, CMYK mode.
Image and Vector Formats
When supplying raster images separately: TIFF is preferred for photographic images — its lossless compression preserves all image data. JPEG is acceptable at high quality settings (maximum, or quality 10–12 in Photoshop); avoid heavily compressed JPEGs. PNG is acceptable for images with transparency, though we prefer TIFF or EPS for most print applications. All raster images must be at minimum 300 PPI at final print size and in CMYK color mode. For logos and line art, supply EPS or a vector-capable PDF; SVG is generally workable but less common in print workflows — confirm with our prepress team before submitting.
Formats We Do Not Recommend for Print
- Microsoft Word (.docx): Fonts, spacing, and layout can shift when opened on different systems. Convert to PDF before submitting.
- Microsoft Publisher (.pub): Limited compatibility with professional print workflows. Convert to PDF.
- Low-resolution JPEGs from the web: Web images are typically 72–96 PPI — far too low for print. Do not submit these for printing.
PDF/X-1a vs. PDF/X-4: Which to Choose
The two PDF/X presets you will most often choose between behave differently under the hood. PDF/X-1a flattens all transparency and requires color to be CMYK or spot — it is the safe, conservative choice that eliminates the most common surprises. PDF/X-4 preserves live transparency and supports ICC color management, which keeps complex effects like soft shadows and blends crisp instead of flattening them. For straightforward jobs, X-1a is foolproof; for designs leaning on transparency, X-4 often produces cleaner results. When in doubt, our prepress team can tell you which fits your specific file.
Before you send anything, run a quick preflight pass — it catches the issues that cause most reprints: RGB images, low-resolution placements, missing bleed, and unembedded fonts. Acrobat Pro and the major design applications include preflight tools that flag these automatically. Running one before submission is the cheapest insurance available in print.
File Formats for Offset Printing
Offset printing has the strictest prepress requirements of the three processes, because jobs go to physical plate-making before they ever reach the press. For offset, PDF/X-1a is the gold standard. It is specifically designed for print production environments and enforces requirements that prevent the most common prepress problems:
- All fonts must be embedded. PDF/X-1a rejects files with missing fonts — eliminating the single most common prepress error.
- All colors must be CMYK or spot (Pantone). RGB and Lab colors are not permitted, ensuring no unexpected color conversion at output.
- Transparency is flattened. All transparent objects are resolved to opaque equivalents, preventing transparency-related output artifacts.
PDF/X-4 is fully supported for offset as well, and is preferable when your design contains complex transparency effects that would lose quality when flattened. Native InDesign, Illustrator, and Photoshop files are accepted under the same packaging rules as digital jobs: packaged links and fonts (File > Package in InDesign), outlined or included fonts for Illustrator, flattened CMYK files for Photoshop, and Pantone colors properly defined as spot — not process.
Offset Resolution Requirements
- Color and grayscale photographs: 300 PPI at final print size minimum; 350 PPI preferred for premium quality.
- Bitmap (1-bit) black and white images: 1200 PPI at final print size minimum.
- Vector artwork: Resolution-independent; supply as vector at all times for logos and line art.
Color: Process (CMYK) and Spot (Pantone)
Offset handles two types of color. Process color (CMYK) is standard four-color printing; CMYK values should be appropriate for the target press condition (typically US Web Coated SWOP for coated stocks). Spot color (Pantone) must be defined as true spot colors using the correct Pantone library in your design software (e.g., "Pantone 485 C" for coated stock). A common error is a "Pantone" swatch that has quietly been set to CMYK, which produces a process build instead of the intended spot ink and adds a plate you did not plan for. Before submitting, confirm each spot color appears correctly in the swatches panel and that the separations preview shows the expected number of plates.
Bleed, Imposition, and Press-Specific Settings
Offset jobs need 0.125" (3mm) bleed on all trimming edges, critical content kept 0.125"–0.25" inside the trim, and printer's marks (crop marks and color bars) outside the bleed area. Supply pages as single pages in reading order — not printer spreads — and let prepress handle imposition, the arrangement of pages on the press sheet so everything folds and binds in the correct sequence.
Offset files also carry production-specific settings that digital users sometimes overlook. Overprint determines whether one ink prints on top of another or knocks out the area beneath it — an accidental overprint on white text can make it vanish. Trapping slightly overlaps adjacent colors so that minute registration shifts on press do not reveal white paper between them. Knockouts remove the background where a foreground element sits. Most of these are handled in prepress, but building files with correct overprint settings — especially on rich blacks and registration black — avoids surprises at plate-making.
Large Format vs. Digital vs. Offset: Requirements at a Glance
- Resolution: Large format is viewing-distance based (15–200 dpi at full size); digital needs 300 PPI at final size; offset needs 300–350 PPI for photographs and 1200 PPI for 1-bit bitmap art.
- Bleed: Large format typically 0.25"–0.5"; digital and offset 0.125" (3mm).
- Color: CMYK across all three; offset adds true spot (Pantone) plates; some wide-gamut large format printers prefer RGB for specific profiles — ask first.
- Safest single format: A print-ready PDF/X for all three — PDF/X-1a when in doubt, PDF/X-4 when live transparency matters.
Frequently Asked Questions
Do I really not need 300 dpi for a banner? Correct. Large-format pieces are viewed from a distance, so 72–150 dpi at full size is typically sharp. Reserve 300 dpi for pieces viewed up close.
Should I send RGB or CMYK? CMYK is the safe default for most presses, but some wide-gamut large format printers prefer RGB for specific profiles. Ask your printer before assuming.
What's the best single format to send? A properly built PDF/X with vector type preserved and images at the right resolution. It travels well, preserves your layout, and works with nearly every RIP.
Can I just send a Word or PowerPoint file? It is far safer to export to PDF first. Office files reflow and substitute fonts on different machines, which can shift your layout unpredictably.
My image is RGB — is that a problem? It can shift colors on conversion. Convert to CMYK with a print profile, or let us know so prepress can handle it consistently.
How do I send large files? Use a transfer service such as WeTransfer, Dropbox, or Google Drive rather than email — or ask us for the best delivery option for your job. Email works fine for smaller PDFs.
Should I flatten my PDF before sending? Not necessarily. PDF/X-1a flattens transparency on export, while PDF/X-4 keeps it live for compatible workflows. Choose the preset that matches your design and let the export handle flattening rather than doing it manually.
Can you print directly from Canva or a design app export? Often yes, if you export a high-quality PDF with bleed and CMYK output. Avoid low-resolution image exports, and send us the PDF rather than a screenshot or web-quality file.
Why did my white text disappear? Almost always an accidental overprint on the white element. Set white type to knock out, not overprint.
How do I know how many plates my offset job needs? View the separations preview in Acrobat. Each plate is one ink — four for CMYK, plus one for each spot color.
Is PDF/X-1a or X-4 better for offset? X-1a is the safe default; X-4 is preferable when complex transparency should remain live rather than flattened. We support both.
Do I need to outline my fonts? Not if they are properly embedded in a PDF/X file, which is the norm. Outlining is a belt-and-suspenders option for Illustrator art, but it makes later text edits impossible, so embed rather than outline unless there is a specific reason.
Submitting Your Files to VSL Print
Whether your job runs on our large format, digital, or offset equipment, our prepress team reviews every file before production begins — and if we find an issue, we contact you before it goes to press, never after. Email smaller files directly, or use a transfer service (WeTransfer, Dropbox, Google Drive) for large packages. Contact us today or request a quote to start your printing project.
Looking for professional printing services?
View Printing ServicesReady to start your print project?
Get a free quote from a NYC commercial printer. Rush turnaround available.